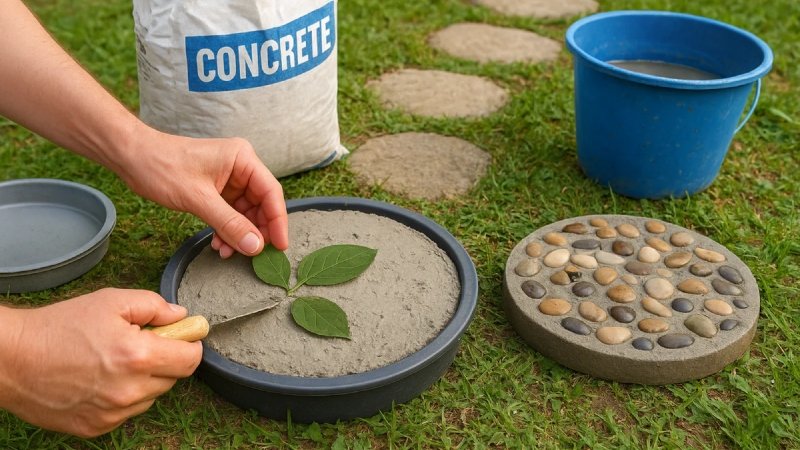
Yes, you can make homemade stepping stones without concrete, and the flour, salt, and water dough method is exactly how. But whether that’s the right choice depends on who’s making it and where it’s going to live. For young kids doing an indoor craft afternoon, a flour, salt, and water dough works without cement, dust, or safety gear, and it sets hard enough to decorate and display. For a stone meant to survive outdoors in a garden path for years, real concrete mixed with actual mosaic tile is the only version that holds up to weather and foot traffic. This guide covers both DIY methods from start to finish, plus how to choose a mosaic pattern that actually works for a beginner, and how to decide between building your own and buying a kit.
Method One: DIY Flour Dough Stepping Stones for Kids
This version skips concrete entirely, which makes it a same-day, indoor-friendly DIY project for younger children. Mix roughly four cups of flour, one cup of salt, and enough warm water to form a firm, non-sticky dough, kneading it the same way you would bread dough. Press the dough into a shallow mold or pie tin about an inch thick, then let kids press small mosaic pieces, buttons, beads, or shells directly into the surface while it’s still soft.
The dough air-dries over several days, or can be baked at a low oven temperature to speed up curing, though a fully air-dried stone will always be sturdier than a rushed, baked one. The tradeoff is durability: this version is meant for display indoors, on a windowsill, in a garden bed as decoration, or as a keepsake, not as a walkway that will take regular foot traffic or winter weather.
Method Two: DIY Mosaic Cement Stepping Stones for the Garden
For a stone that needs to actually function as a garden path, real concrete is the right material, and this is where mosaic tile becomes worth using instead of household odds and ends. Mix a quick-setting concrete product according to the package instructions, pour it into a stepping stone mold about one and a half to two inches deep, and press mosaic tile pieces into the wet surface before the concrete begins to set, typically within the first 20 to 30 minutes.
Working in wet concrete means gloves and eye protection matter here in a way they don’t for the flour version, and this step is better handled by an adult or with close supervision for older kids. Once the design is set, the stone needs to cure fully, usually 24 to 48 hours before it can be safely moved, and up to a week before grouting.
If it’s your first stepping stone, don’t try to fill the entire mold with an intricate pattern. Starting with a simple border or spiral makes it much easier to keep tile spacing even while the concrete is still workable. Avoid pressing tiles too deeply into the wet concrete as well. They should sit just proud of the surface so there’s enough space for grout later without leaving sharp edges exposed.
Choosing Tile for Your Mosaic Design
Broken dishes and craft-store mosaic tiles work for the display-only flour version, but for a stone that lives outdoors, tile material matters more than most beginners expect. Porcelain and stoneware hold up well to freeze-thaw cycles, while glass mosaic tile adds color and light reflection but can be more prone to cracking under heavy foot traffic. A mosaic tile collection designed for wet, high-use spaces like showers and pool surrounds is generally a safer bet for garden stones than decorative craft tile, since it’s manufactured to handle moisture and temperature swings rather than just to look good indoors.
Mosaic Patterns That Work for Beginners
Looking for DIY stepping stone ideas that don’t require much experience? The most beginner-friendly patterns are the ones with forgiving symmetry: a simple sunburst radiating from the center, a spiral, or a border ring around the stone’s edge with a single centered shape in the middle. These patterns hide small spacing inconsistencies better than a design that depends on precise straight lines or lettering.
Freeform mosaic, where pieces are placed by color and shape rather than a strict pattern, is actually easier for a first attempt than it looks, since there’s no alignment to get wrong. Save monogram letters, detailed florals, or pet portraits for a second or third stone, once you have a feel for how far pieces need to be spaced for grout to fill in cleanly.
Mosaic Pavers and Kits vs. Building From Scratch
Pre-made mosaic pavers, finished stones you buy ready to place, skip the entire process but also skip the part most people actually want, the personalization. A mosaic stepping stone kit sits in the middle: it typically includes a mold, tile pieces, and adhesive, and it’s a reasonable shortcut for a first project or a group activity where consistent results matter more than full creative control.
Building entirely from scratch, sourcing your own mold, concrete, and tile separately, costs less per stone if you’re making more than one or two, and it’s the only option if you want a specific color palette or pattern a kit doesn’t offer. If you’re at the stage of sourcing tile specifically, this guide to the best online tile stores in the USA breaks down which retailers are best suited for mosaic, porcelain, and specialty materials rather than treating all tile shops as interchangeable.
Turning Leftover Tile Into a Stepping Stone Project
If a tile renovation somewhere in the house left behind broken pieces, cut-offs, or a partial box that’s not enough for the original project, a mosaic stepping stone is one of the most satisfying ways to use that material instead of throwing it out. This is really the same resourcefulness principle behind most family craft projects, just applied to a material that would otherwise end up in a landfill. If you’re looking for more ways to repurpose materials left over from a home project rather than starting from new supplies, this guide to eco-friendly home upgrades covers the same reuse-first thinking applied to bigger projects around the house.
Tips for a Stone That Actually Lasts Outdoors
Seal the finished stone with a concrete sealer once it’s fully cured, this protects both the concrete and the grout from water absorption and freeze-thaw cracking over multiple seasons. Most concrete manufacturers also recommend allowing new concrete to cure fully before sealing, since sealing too early can trap moisture inside the slab. Keep the tile pieces relatively flat and similar in thickness across the design, since uneven heights create both a tripping hazard and weak points where the concrete can crack. If you’re planning several stones with a consistent color palette, ordering a few tile samples in advance helps ensure the materials work together before buying larger quantities from an online tile store.
Flour Dough vs. Mosaic Cement: Quick Comparison
| Design Feature | Flour Dough Version | Mosaic Cement Version |
| Best Application | Indoor craft time with young children | Durable outdoor garden pathways |
| Binding Base | Flour, salt, and water mixture | Quick-setting commercial concrete |
| Cure Timeline | Several days of steady air-drying | 24–48 hours to set; 7 days to cure before grout |
| Weather Resistance | Non-resistant; degrades in moisture | High resistance when sealed correctly |
| Safety Equipment | None required | Heavy gloves and eye protection recommended |
Conclusion
The right DIY stepping stone project depends entirely on the goal. A flour dough version gives young kids a same-day, low-mess craft with no cement or safety gear involved, while a real mosaic cement stone takes more time and a bit more caution but produces something that survives an actual garden path for years. Starting with the dough version as a trial run for pattern ideas, then graduating to the cement version once a design feels right, is a natural way to work through both without wasting materials on a first attempt gone wrong.
Mineral Tiles is a U.S-based online tile store that offers porcelain, glass, and natural stone mosaics commonly used for shower walls, pools, and decorative outdoor projects, making it a useful resource once you’re ready to build a permanent stepping stone.
FAQs
Can you make stepping stones without concrete?
Yes, a flour, salt, and water dough works as a concrete-free alternative for indoor, display-only stepping stones, though it isn’t durable enough for outdoor foot traffic.
Are homemade DIY stepping stones as durable as store-bought ones?
It depends on the method. A flour dough version is not weather-resistant and is meant for indoor display, while a properly cured mosaic cement stepping stone, sealed and made with quality tile, holds up outdoors just as well as a store-bought paver.
How do you make homemade stepping stones?
Mix a quick-setting concrete in a mold about one and a half to two inches deep, press mosaic tile or decorative pieces into the wet surface, let it cure for 24 to 48 hours, then grout once fully set.
What’s the easiest mosaic stepping stone pattern for a beginner?
Simple radial patterns like a sunburst or spiral, or a border-and-center design, are more forgiving of small spacing errors than lettering or detailed images.
Is it cheaper to buy a mosaic stepping stone kit or make one from scratch?
A kit is usually more convenient for a single stone or a group activity, while building from scratch costs less per stone if you’re making several and want more control over color and pattern.
Can leftover tile from a renovation be used for stepping stones?
Yes, broken or leftover tile pieces work well for mosaic stepping stones, making it a practical way to reuse material that would otherwise be discarded.